This was the lesson I’ve been waiting for ever since I decided to learn to fly: Circuits.
The lesson the day before had completed the first page of my Pooleys flying log book and I took a moment to reminisce about the aircraft I’d already had the pleasure of flying.
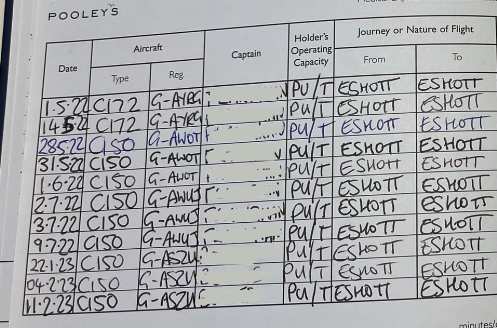
I’d started my flight training in G-AYRG, a Cessna 172, or more accurately, a 1971 Reims-Cessna F172K Skyhawk. I’d originally chosen to learn in the more expensive, larger, 4 seat Cessna with it’s massive 6-cylinder Rolls Royce engine thinking at the time that the 172 would be a safer and better handling aircraft than the smaller 2-seater 150s in the fleet. I also had been watching a lot of Aviation 101 on YouTube and really liked the look of N80991. I went on to do my first landing in G-AYRG!
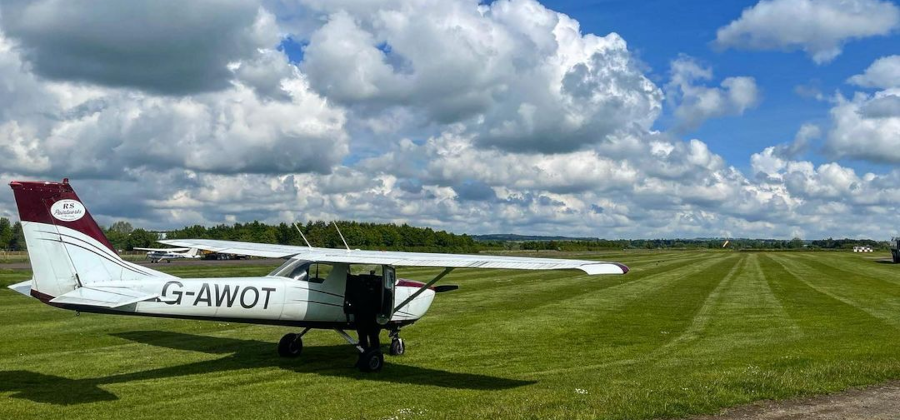
Then I switched to the darling of the flight school fleet, G-AWOT, a beautiful, metallic-red-nosed Reims-Cessna F150H that I nearly crashed trying to take off in. I managed more landings and enjoyed 3 lessons in AWOT before she was sadly written off in an accident.
Next came G-AWUJ, another F150H, with her brand new engine and propeller, slightly dodgy rudder but great handling. I flew AWUJ 3 times before my instructor got a job in the airlines and I needed to get a medical with some post-COVID medical issues, so flying was paused from July 2022 until January 2023.
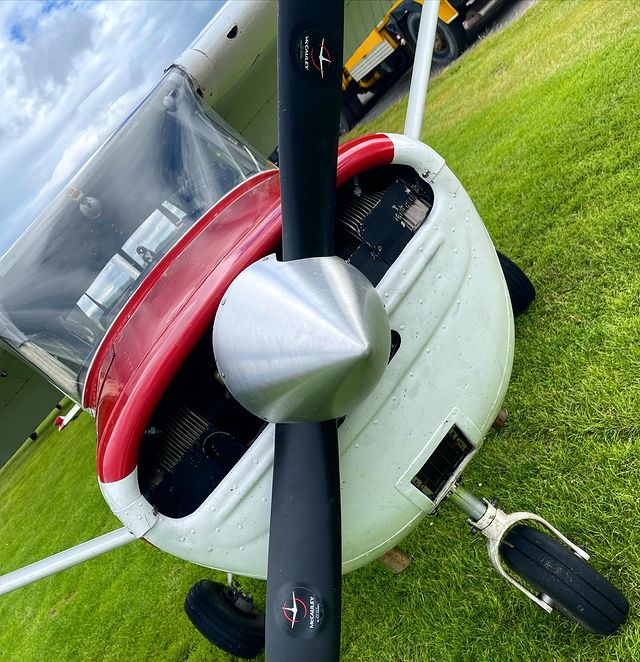
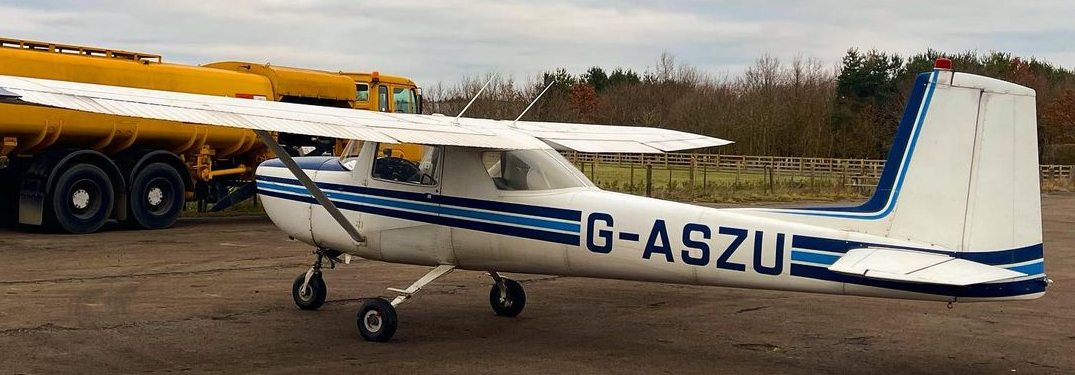
And finally in 2023 I’m flying G-ASZU, the beautiful, classic Cessna 150E (see top of the blog!).
With over 14 hours of flight time in the logbook I was ready…
Circuits
Flying a circuit is straight forward (I won’t say “easy” because sometimes it isn’t) and you simply follow a set of steps in sequence.
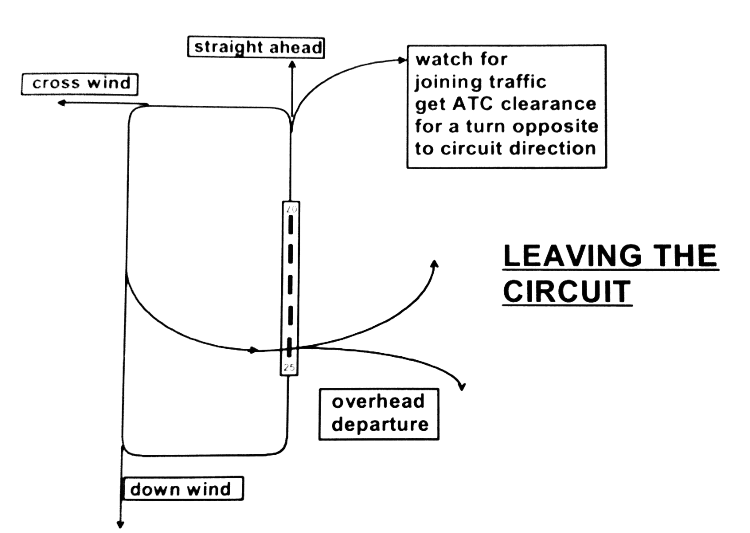
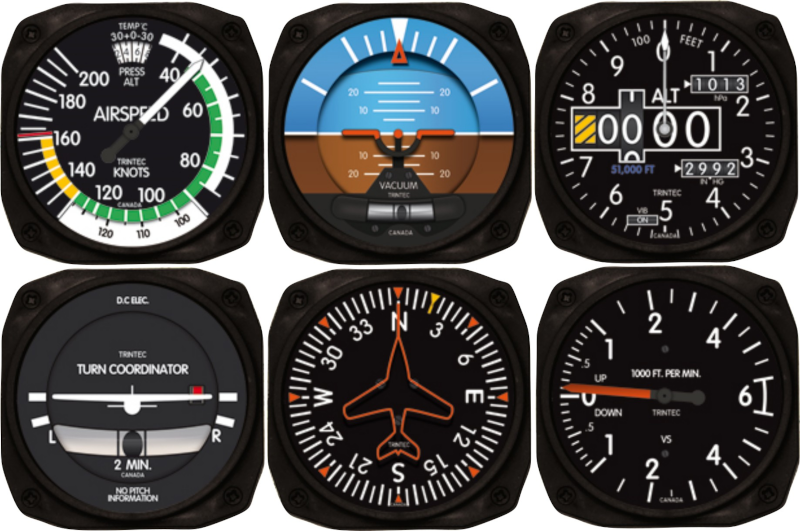
You take off, try to stay on the same track as the runway you’ve just taken off from (this is known as the “upwind leg”). As you climb to “pattern altitude” – typically 1,000ft above airfield level (aal), i.e. QFE – you raise the flaps at 300ft aal, continuously climbing at Vy (best rate-of-climb speed) which is 60 knots in G-ASZU.
At 500ft you start your 90-degree turn onto crosswind.
Downwind
Once you’re at 1,000ft QFE you turn onto downwind and make the downwind radio call:
“Golf-Alpha-Sierra-Zulu-Uniform, downwind runway one-niner.” This tells any other traffic in the pattern or about “to join” or on the ground or just on the frequency, where you are. One thing to bear in mind is that some old aircraft are NORDO – no-radio – so keeping a good lookout is still essential.
As soon as the downwind radio call is made you start the downwind checks, AKA “BUMFILCH”:
- B – Brakes – check for pressure in the toe brakes.
- U – Undercarriage – in a “complex” aircraft with retractable gear this is a good time to consider lowering the gear and checking the down-lock lights are on. In the Cessna with fixed gear, I always like to check the wheels are still attached and the tyres look inflated and you can see them by looking out the window and down as they stick out from the fuselage.
- M – Mixture – “set for best power” which at sea level or thereabouts is usually full rich.
- F – Fuel – check there’s enough for a go-around if you need to, that the amount in the tanks are in balance and the fuel cock is set to both / on. At this point you’d switch on fuel pumps if one was fitted and required. I also check F – Flaps – should be up and wing should be clean ahead of configuring for landing.
- I – Instruments – oil temperatures and pressures in the green band, suction, ammeter charging, altimeter is on correct QFE setting and height is correct pattern height, and align the Direction Indicator (DI) with the magnetic compass.
- L – Landing light – not usually required for VFR (Visual Flight Rules) day, but sometimes in a busy pattern you want this on to improve your visibility to other traffic.
- C – Carburettor Heat – set to hot to get rid of any ice in the carburretor.
- H – Hatches (doors) and harnesses (seatbelts) secure.
By the time you’ve done all that you should be in line with the threshold of the runway you’re landing on and starting to configure for landing.
To configure for landing you:
- Pull the carb heat to keep the carburretor warm during the low-power descent
- Reduce power to 1,500rpm
- Hold the nose on the horizon to allow the speed to bleed off
- Once the airspeed is within “the white arc”, which is the flap-extension speed arc, we drop two notches of flaps – i.e. 20 degrees – and watch the speed bleed off even faster now with more drag on the airframe.
- At 60 knots, pitch the nose down to maintain that speed and use the elevator trim to reduce any pressure required to maintain 60 knots.
Base and Final
Next, at 800ft aal (QFE) we turn onto base. Optionally at this point you can make a radio call alerting other traffic that you’re on base, a good idea in a busy circuit but it’s optional. Then finally, at around 500ft, we turn onto final and line up with the runway.
Over time, with practice, you build up a “sight picture” in memory of what it looks like to be on a good approach profile. If the runway looks flat, you’re too low, if it looks too tall you’re too high.
What takes practice is that you use the controls and throttle back to front on approach:
- Use your pitch to control speed
- Use your throttle to control descent rate
If you try to pitch up to reduce your descent rate you slow down and descend even faster, likewise, if you use your throttle to control your speed you mess up your glide path. Once you do it a couple of times it becomes second nature and you can pretty much land by watching the runway and occasionally glancing at the airspeed indicator (ASI) to check you’re on best-glide speed.
How to Land a Small Plane (Theory)
At around 50ft above the ground, reduce power to idle whilst “catching” the nose which will try to swing right (relatively speaking) as the torque and propwash from the propeller goes away.
Just before the threshold, at around 5-10ft above the ground, fly level until the airspeed bleeds off and you feel the aircraft start to sink. Progressively pull back on the controls to reduce the sink rate while keeping your eyes on the far end of the runway and using your rudder pedals to stay lined up with the centre line on the runway.
You will probably hear the stall warning horn kick in at some point if you’ve managed to slow the descent rate correctly with your pitch-up attitude. Eventually the aircraft will run out of lift and you’ll be plonked onto the ground.
If you managed to get her down in a reasonable amount of distance, you can power up with a bit of right-rudder and head back into the air for another trip around the circuit.
In Practice
It took me a few trips around the circuit to get into the groove but, compared to the immense winds from the previous day’s lesson, I had one thing in my favour: I was flying in almost completely still air.

My first point of clumsiness was I was missing the 300ft point to raise the flaps, but this was sorted out by the third climb.
The next was missing the 500ft point to turn onto crosswind, again this was sorted out pretty much on the 2nd climb, and I’d started to incorporate a lookout and wing-tilt at 450ft to check for traffic hiding in our blind spots.
Next, was speed, and this is something I pretty much failed with throughout – I kept letting the speed creep up well beyond the 60kts I was trying to stay at for best climb rate. The trouble is, being relatively short in the torso, at 60kts I can’t see anything over the nose of the aircraft, no reference points, nothing, so I instinctively lower the nose to try and get a visual reference point to climb to in order to manage any wind drift. By the end of this lesson I was using other methods to stay on track, such as glancing at the DI.
I’d drilled downwind checks with my previous instructor and I was comfortable doing those.
Finally, the last thing we worked to refine was when to reduce power to idle on short final and nailing the touch-down. After a few circuits I was landing consistently nicely – on centre line, gentle touchdown, safe transition back to take off.
So, can I solo?
After an hour of going in circles I was on the base leg waiting for the ground to get a little closer before I turned onto final.
“I’ve not had to touch the controls once,” said the instructor. “I think you’re ready to go solo.”
My heart jumped. I’d seen this moment in dozens of videos on YouTube. The student lands, the instructor gets out and says something pithy like “why don’t you take her for a spin around the pattern yourself?” and the student does their first solo circuit.
“Trouble is, I’m restricted and we need [the chief flying instructor] to sign you off before you can, and he’s out on another lesson.”
My buoyant heart sank into the abyss.
“Next lesson, you can take him around the circuit and get your first solo under your belt.”
Despite the disappointment that I’d not be soloing today – and I felt really ready for it – I landed pretty well, one of the best of the session, parked up and went into the clubhouse.
So, no solo yet, but next lesson is “Circuits 2”, another hour of going around in circles and if I feel as ready next time as I did this time, I should be taking control of an actual aircraft all on my own.
I’ve acquired a GoPro to record it too!
Stay tuned.