Checking the weather in the days before this lesson I was 50/50 whether I would be taking off at all. Wind was showing as 14 knots (16mph) gusting to 26 knots (30mph) all week. When I got to airfield the cloudbases were at 2,500ft and the wind was a steady 12 knots but heading straight down the middle of runway 01 – pretty good flying conditions!
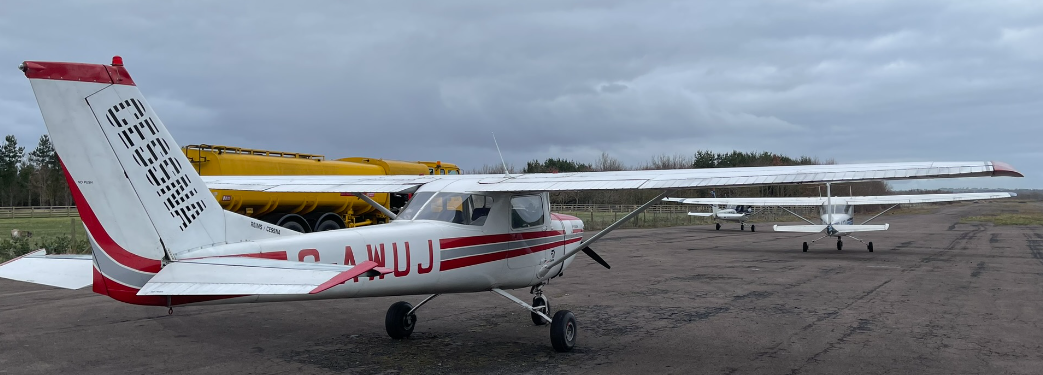
So that she could meet the hour-requirement for an upcoming maintenance check, I swapped from the classic straight-tailed Cessna 150E to my old trusty F150H, G-AWUJ. The Reims-Cessna F150H was built in France by Reims under license from Cessna. It was built in 1968, only 3 years after the 150E but has some significant improvements to the design – the swept-back tail is more aerodynamic, making it noticeably quicker around the pattern. And the doors are big enough to allow actual humans to get on board, not just circus contortionists. The final major change between the two was by the time the F150H rolled off the assembly line the manual flaps had been upgraded to electrically-operated.
I ran through the external checks and internal checks up to the pre-start checklist myself then joined my instructor back inside with my fingers freezing – it was 3 degrees Celsius outside and that wind wasn’t helping. The aircraft was in perfect condition though!
As the wind whipped around outside and the sky started to get darker, my instructor said that if everything went well today, I’d be solo-ing on the next lesson and he was now unrestricted so didn’t need Chief Flight Instructor sign off for me to solo, he could do that himself. But first I needed to know how to deal with several emergencies.
Fire! Fire!
We are not fond of fire in aviation, but it can happen and we need to know what to do when it does. The resounding smell of aviation is fuel and the entire activity revolves around burning that in a variety of ways to create thrust, so it’s a recipe for fire related emergencies.
Fire can occur at two points: on the ground or in the air (duh!) and naturally you don’t handle both of those situations the same, but there’s also a bunch of different types of fire that can happen, the main ones are engine and electrical fires, but also fires that occur in the cabin.
Here’s a quick reference guide to what to do in the event of a fire…
NOTE: It’s always wise to turn off the cabin heat in the event of a fire to avoid smoke and fumes coming into the cabin
| On the ground | In the air | |
| Engine fire | If the fire begins when starting the engine, pull the mixture out fully (fuel cut off) and ‘motor’ the engine (keep it turning over) with the starter motor. This will flush all the fuel in the engine and supplying fuel lines through. If the this doesn’t stop the fire, or if the fire occurs whilst taxiing, in which case stop the aircraft in a safe place then: – Turn the fuel cock to “Off” to starve the fire – Turn all switches off. – Ensure brakes are on. – Evacuate, taking the fire extinguisher with you. | Ideally you don’t want to turn the engine off in flight in a single engine aircraft unless you absolutely need to. For a small fire it may be possible to extinguish it with airflow alone. Carefully advance the throttle to full power to increase propeller wash and if you have enough altitude, lower the nose to build up airspeed. If the fire gets worse when advancing the throttle (this increases fuel flow!) don’t put more fuel into the engine. If extra airflow doesn’t extinguish the engine, shut down the engine: – Close the throttle, fully lean the mixture and turn off the fuel cock. – Switch off the magnetos / ignition switches – Prepare for a forced landing. |
| Electrical fire | – Master switch to Off – Turn off all other switches (except magnetos / ignition switches) in case there is a short circuit that is bypassing the master switch – Open the windows for ventilation and use the fire extinguisher if necessary – Stop the aircraft somewhere safe, stop the engine, turn off the ignition and evacuate, taking the extinguisher with you. | – Consider making a radio call that you are about to lose electrical power – Master switch to Off (the engine will still run without the master switch being on) – Turn off all other switches (except magnetos / ignition switches) in case there is a short circuit that is bypassing the master switch – If the fire continues and there is an immediate threat to life, open the Cabin Air vents / windows as appropriate and attempt to use the fire extinguisher. – Land as soon as possible (divert if engine is running safely, or forced landing if ignition needs to be switched off) |
| Cabin fire | – Identify the source of the fire and attempt to put it out with the fire extinguisher. – If moving, stop the aircraft somewhere safely – Set parking brake – Turn off the engine and master switch – Evacuate taking the fire extinguisher with you | – Fly the aircraft – Identify the source of the fire and attempt to put it out with the fire extinguisher – If the fire does not go out prepare for an immediate landing Once on the ground: – Set parking brake and shut down the engine. Turn off the magnetos / ignition switches. – Switch off master switches – Evacuate, taking the fire extinguisher with you |
Circuits 2
So the main goal of today was to practice more circuits around the pattern ahead of a possible first solo flight. Another student, who we’d see again a few times on this lesson managed to get away ahead of us and was doing power checks at the holding point when we were ready to, so we did our power checks on our parking spot. After watching them line up and take off we backtracked down runway 01, swung the aircraft around in a 180-degree turn and lined up. The wind was coming straight down the runway and the air speed indicator (ASI) was already starting to register the airflow.
I ran through my “last chance” mental checklist:
- Flaps 10 degrees
- DI matching Compass
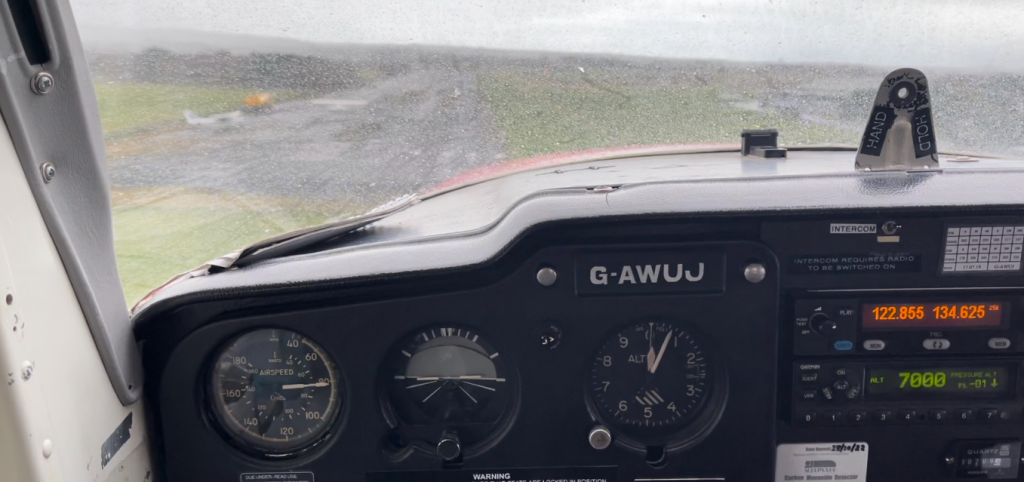
- Altimeter set (QFE today as we were staying in the circuit so the Altimeter showed 0ft above airfield level (aal))
- Transponder set to Alt and squawking conspicuity (7000)
All good! I pushed the throttle progressively to the firewall adding a dab of right rudder to keep on the centreline. “Airspeed alive, Ts & Ps in the green, RPMs stable”, I said, checking that we were safe to fly. At 60 knots I pulled back gently on the controls and UJ lifted into the fast-moving air right on our nose.
Headwinds
Climbing into a strong headwind shortens the distance you cover over the ground during your ‘upwind’ leg of the circuit. We turned left onto crosswind at 500ft but had barely gone a few hundred metres from the end of the runway we’d just took off from, even though it’s a small-ish runway.
Runway 01 has a heading of approximately 010 degrees on the magnetic compass, so a 90 degree left turn onto the crosswind leg should have us pointing roughly at 280 degrees on the compass (010 is 10 degrees more than due north (0 degrees so 90 degrees left will be 10 degrees more than due west which is 270 degrees on the compass). However, I had to keep the nose pointing into the wind to ‘crab’ sideways along crosswind without drifting south. After a few trips around the circuit we settled on pointing towards a village in the foothills of the Cheviots to stay on crosswind, which was roughly a heading of 300 degrees on the DI.
The trouble with crabbing into the wind is that some of the plane’s energy that should be spent climbing is lost just counteracting the wind so we ended up on an extended crosswind, flying further west than we normally do.
A strong headwind on take off also means your downwind leg is over very quick, so you have to be crisp and efficient with your BUMFILCH checks!
Turning onto base leg, again you need to point your nose into the wind, this time we were practically pointing at the threshold for the runway while power-sliding sideways as we configured for the landing.
The last thing to bear in mind with a strong headwind coming straight down the runway is that you need to approach steeply as the aircraft will travel through a lot more air than the amount of ground you’ll cover.
The Noise Complaint
After a few circuits we got called up unexpectedly on the radio.
“Uniform Juliet, Eshott?”
“Uniform Juliet,” said my instructor.
“Could you try and bring your circuit in a bit, we’ve had a complaint about noise over to the west.” It was the Airfield Director.
“We’ll do our best,” replied the instructor.
From that point on we extended our upwind leg, not turning onto crosswind until 700ft, this not only brought us closer to the airfield but later when we’d landed we were told that the airfield had received a follow up call thanking us for changing our flight path.
# Oh the weather outside is weather… #
That reminds me I need to rewatch Forgetting Sarah Marshall…. Anyway…
In today’s 1 hour and 5 minute lesson we experienced all the weathers. The wind changed direction from a bitter northerly to a gusty north-easterly causing us to almost change runways before abandoning the idea when the wind sprung back to coming from the north again. At one point we hit a patch of hail that pelted us through the air vents before we quickly closed them.
One approach was quite unstable but I thought I’d managed to salvage it. As I levelled out into ground effect a gust hit us and we climbed into the air again. “Go around!” said my instructor and I aborted the landing.
The go-around procedure is straightforward in principle but you need to take care as it can catch you out, especially in windy conditions:
- Push the throttle to full power and raise the nose – no point in accelerating towards the ground you’re trying to leave!
- Apply right rudder to counter-act the yawing moment caused by the power up (this can be more significant than on the ground because you don’t have the friction from the nosewheel resisting the nose moving)
- Catch the nose before it over-rotates. You will be trimmed for a low-power approach not for a full power climb, so you’ll be out of trim. Specifically, you’ll need to hold the nose down until you can retrim.
- Set the carb heat to Cold to give you full power
- Once a positive rate of climb registers on the Vertical Speed Indicator (VSI) bring in the flaps one notch (from 20 degrees to 10).
- Climb out as normal
Engine Failure!
Low-energy situations are inherently dangerous. This might be “low and slow” on approach, where you don’t have the airspeed to arrest a rapid descent rate. Another low energy situation is during the climb – your air speed is usually quite low (60 knots in the Cessna 150) and you don’t have a lot of altitude to trade for airspeed. Low energy = potential for stalling.
I have had dreams about losing the engine just after take off. It’s not something you want to have happen to you, but it does, so we train for it.
We landed, briefed the engine failure after take off (EFATO) procedures and then we took off again – the instructor demonstrated it to me during the climb out, then one trip around the circuit and it was my turn.
I landed with a bit of a bump, pushed the throttle to full power while simultaneously pressing the right rudder pedal and closing the carb heat. I raised the flaps at 300ft.
“My throttle,” said the instructor.
“Your throttle,” I replied, taking my hand off the power control.
At 400ft we hit a brick wall as the instructor pulled the throttle back to idle. “Uniform Juliet, simulating fan-stop,” he said over the radio, in case any other aircraft in the vicinity saw us in mock distress.
Airspeed is life so the risk during an EFATO is that you run out of it. Climbing with no engine power doesn’t work, but at the same time, you don’t want to push the nose down too fast because you have some momentum which will carry you a few extra tens of feet into the air, which might make all the difference when trying to make a good landing spot.
I gently pushed the nose forward and designated a smooth looking field. “That one,” I said as I made a turn towards it and used pitch (the only weapon left in the arsenal) to keep precious airflow over the wing at best-rate-of-glide, 60 knots.
Once we crossed the A1 dual carriageway at 250ft, with the field easily within our reach the instructor gave me the throttle back and I powered the Rolls Royce-built Continental O-200-A engine back to full power, turning right in the climb to get us back on course.

Brake failure!
The next challenge my instructor threw at me was a failure of the brakes.
Turning onto downwind I made the standard radio call, “Golf-Uniform-Juliet downwind runway 01” and started to go through the BUMFILCH downwind checks.
“Brakes, pressure, check,” I said, starting my routine.
“Nope. Brakes have no pressure, complete hydraulic loss,” role-played the instructor.
“Affirm,” I said with a smile, completing the rest of the checks.
A few minutes later, turning to line up with the runway I made the radio call I’ve been looking forward to for a while. “Golf-Uniform-Juliet, final runway 01 Grass.”
There are a few things you can do if your brakes fail. Landing on a high-friction grass runway is one, our airfield has a grass runway that runs parallel to the tarmac runway 01, but not all airfields have one. In those cases you can use aerodynamic braking to slow you down – lower the flaps to full extension, pull the controls all the way back so your elevator adds air resistance, and my previous instructor suffered brake failure for real on landing once while flying solo and, ingeniously, he opened both of the passenger doors to use them as giant air brakes.
I’ve never landed on grass before so this was fun. You don’t get the same visual cues because you don’t have a centre line but it’s pretty much the same deal. I plonked the little Cessna down a bit harder than I’d have liked but she was down and we let the grass bring us to a halt just for the experience, all the while holding the controls fully back to relieve pressure on the nose wheel.
So, can I solo now?
After seven take offs and landings, wind, rain, hail, sun, grass runways, engine failures, brake failures and one noise complaint, I finally brought G-AWUJ into a “full stop landing”, parking her at the west apron in front of the fuel bowser.
“We’ve run out of time today but next time we’ll do a few more circuits, and if you can demonstrate 3 good landings in a row, I’ll get out and you can take her for a circuit solo.”
So that’s the plan for the next lesson and I’m a little bit very excited.