Dec 31st 2021 23:59 – As the minute hand of Big Ben hoisted itself to point straight up toward the ‘XII’ I took a moment to reflect on what I wanted to do in the forthcoming year. I made two resolutions:
- Invest in the friendships and relationships that had stagnated during the pandemic
- Learn to fly.
My Love-Hate Relationship with Flying
I’ve always loved planes, ever since my parents took me to the local airport viewing terrace in the late 1980s and early 1990s (yes I’m that old). However, when I was around 10 or 11 I developed a deep, overwhelming and crippling fear of flying.
In the 2010s my job required me to fly on business fairly regularly. I’ve written before about my trips to the West coast and to India. It was through travelling that I overcame my fear and began to love leaving Earth’s surface and embrace soaring above it instead.
I will write a post another time about some tricks I used to conquer fear of flying as I know it affects a lot of people.
Getting Started
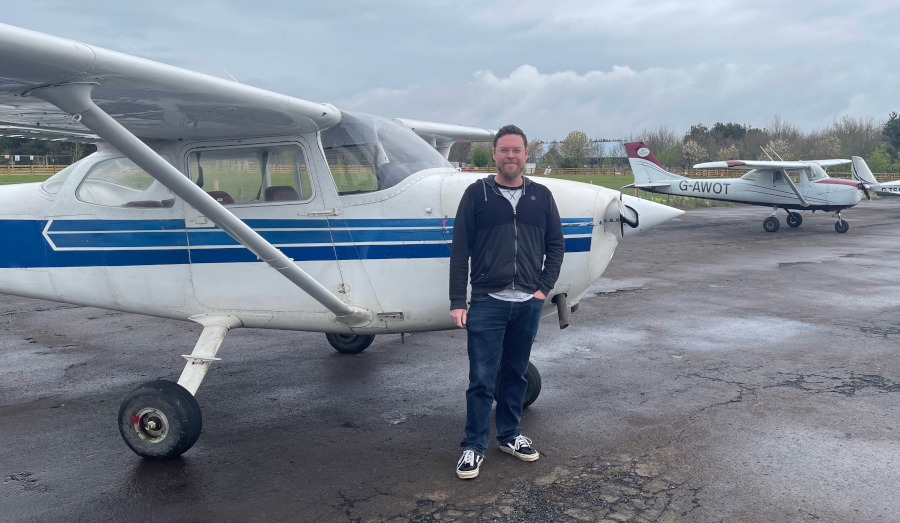
A friend of mine had already started his Light Aircraft Pilot’s License (LAPL) and recommended a flight school to me. One weekend I headed up and spoke with the Responsible Manager about how to get started.
One thing that sets aviation apart from other activities is the humbleness of pilots and the RM was no different. With over 450 hours in the air in his logbook he was candid about what he still couldn’t do. It was refreshing and reassuring and I booked my first flight there and then.
Ground School
I arrived for my first lesson, met my instructor and was taken into the briefing room where I was taken through what we would be doing, then we headed out to the aircraft, a 50 year old Reims-Cessna 172K with a big, powerful 6 cylinder Rolls Royce engine.

My instructor took me through the start procedures with the help of a checklist. I was pleasantly surprised that I was allowed to do everything myself.
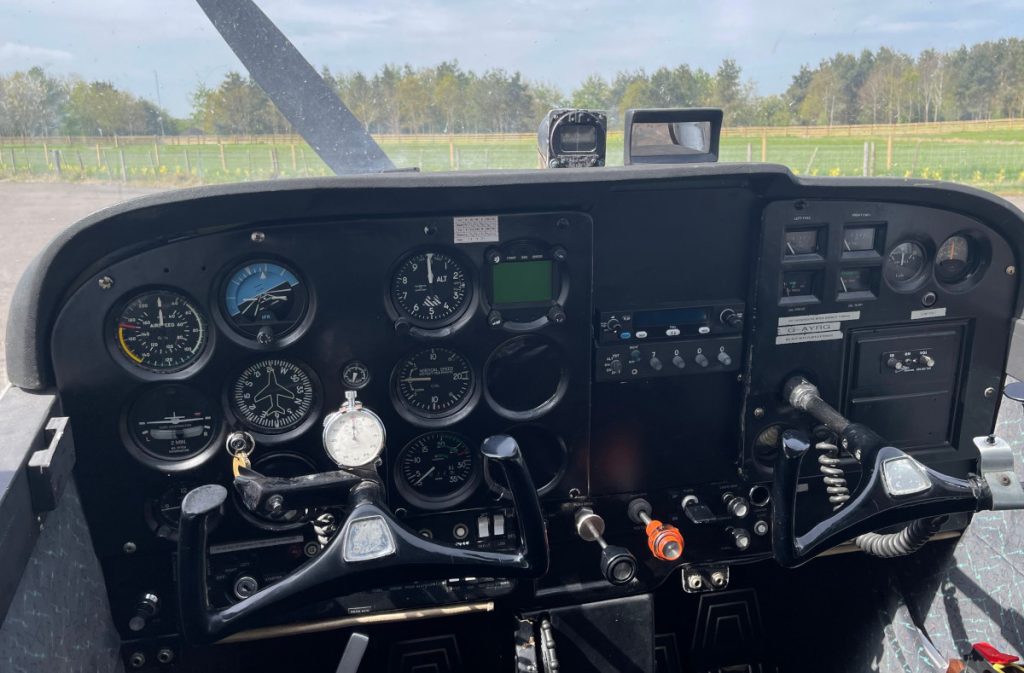
Once the engine was running (indicated by the large air conditioning fan on the front of the plane spinning) we ran our first check (flying is 99% checks and 1% sticking the landing) – the ROSAMS:
- R – RPM – I pushed the throttle in until the tachometer showed the engine was turning at 1200rpm. At this power setting – with the brakes firmly on – we perform the next few checks.
- O – Oil pressure in the green band within 30 seconds – the engine idles at around 500-600rpm and red-lines at 2500rpm so at 1200rpm it was just enough to get things warming up and pressures building without putting too much stress on the engine.
- S – Starter motor warning light out – when you turn over the engine to start it, this light comes on signifying that the starter circuit has been closed. It’s important to check that the starter has disengaged once the engine is turning.
- A – Ammeter – there is a generator attached to the engine which feeds the electrical system and the battery. When the battery is providing power the ammeter shows a negative charge (discharging), while when the engine is charging the battery the ammeter shows positive charge.
- M – Magnetos – These work like spark plugs in your car but as we like systems to be redundant and fail-safe in aviation there are two magnetos (left and right) in the Cessna 172 (C172). When you start the engine the key in the ignition turns to “both” magnetos, just like in a key-start car when you turn the ignition on then turn again to start the engine before the spring returns the key back to the ignition step. You then turn the key to Right, which means only the right magneto is providing sparks in the engine, then to Both again, then to Left, checking the RPM each time – a drop of 75rpm is normal when cutting out one of the magnetos because you get slightly less complete combustion.
- S – suction – some of the instruments rely on a vacuum so that the gyroscopes in them aren’t impeded by the air. The engine has a suction pump on it which creates the vacuum condition and the amount of suction is shown on a suction gauge.
We then did an Idle Cut Off (ICO) check – which basically means we pulled the throttle back to idle and made sure the engine didn’t cut out. This would be a bad thing in the air!
Take off!
After the ROSAMS check was complete my instructor handed over control of the plane to me (squee!) and we allowed the plane to roll forward to test the brakes, which are on the top of the rudder pedals so are known as ‘toe brakes’. Then I had to make a radio call. “Golf-Alpha-Yankee-Romeo-Golf backtracking runway one-niner to Charlie”, I said like an absolute pro, reading off a card my instructor had put in front of me.
I taxiied the plane onto the runway and started to head down it the wrong way (i.e. with the wind behind us), but this was entirely to plan as we were performing a ‘backtrack’ (driving the wrong way down the runway) so we could do a quick 180deg turn and then take off. Pilots prefer to take off and land into the wind as it means more air – and therefore more lift – over the wings at slower ground speeds.
At the end of the runway we pulled off into a position marked with a ‘C’, hence why we said we were backtracking ‘to charlie’, and spun the aircraft around to turn into the wind. Now we performed a run-up, which required us again to put the engine at 1200rpm, do another magnetos test, and another idle cut off (ICO) test too. We then dropped the flaps 10 degrees to give us more lift at slow speeds.
Then another card landed on my lap, which I read out into the microphone. “Golf-Alpha-Yankee-Romeo-Golf taking off runway one-niner”.
“You have control,” said my instructor, so I taxiied the plane onto the runway, got lined up and advanced the throttle to full power (taking 3 seconds to push it all the way forward per my instructor’s earlier guidance). The little Cessna shot off like a rocket.
With no prior experience and no muscle-memory I meandered down the runway like a drunken idiot, before I remembered our next checks: ATR:
- A – Airspeed rising – the airspeed gauge is powered by a tube (‘pitot tube’ – not a typo) hanging from the left wing which measures the amount of air (i.e. the pressure) going into it. If the airspeed didn’t rise, we may have a blocked pitot tube which is a very dangerous situation.
- T – temperatures and pressures – we make sure that everything is ‘in the green’ on the gauges
- R – RPM stable – we want maximum power but also we want the engine to be stable and happy. If the RPM gauge needle is bounding around it may indicate a serious engine problem, which would necessitate aborting the take off.
At around 60 knots, the controls got light and the aircraft began to lift off the runway of its own accord. I stopped the nose rapidly climbing for the sky with a bit of forward pressure on the control yoke and climbed out.
“Airborne,” my instructor said, and I’ll be honest my heart fluttered with excitement. I was actually flying a real plane.
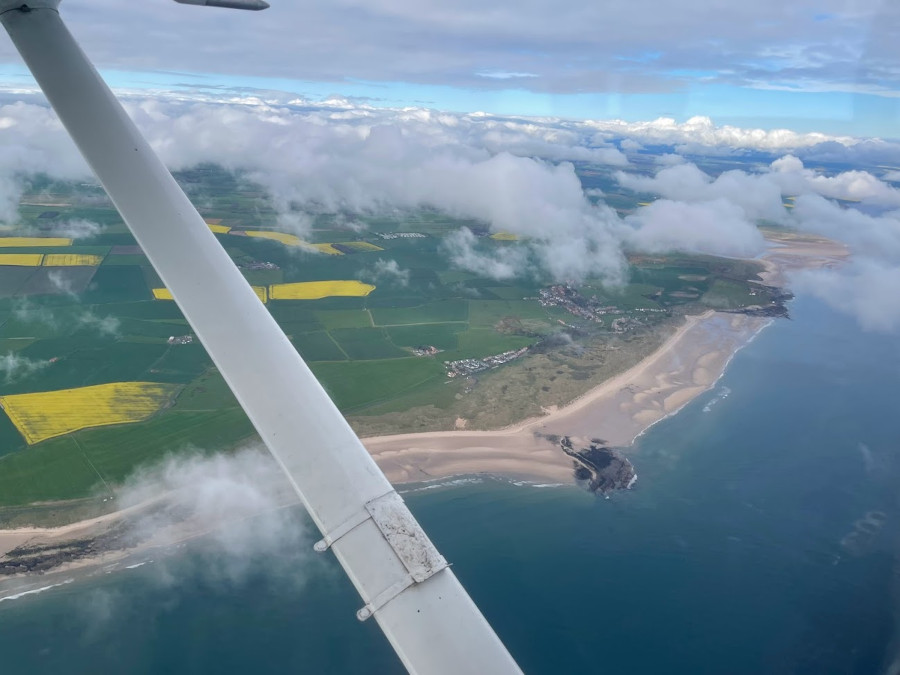
Following his instructions I kept the top of the nose visually on the horizon which gave us a climb rate of around 500 feet per minute, nice and comfortable. I pulled the flaps up and made a turn towards the beautiful Northumbria coastline.
Lesson 1: Exercise 4a – Effects of Controls
Time to do some work! As a highly experience flight simulator nerd, I am used to flying with the instruments but that’s not what I was here to learn today. The Private Pilots Licence (PPL(A) – the A stands for Aeroplane, there is also a PPL(H) for helicopter pilots) is a visual flying license and I was to learn how to fly the Cessna on visual information only.
At cruise power, and a clean wing (flaps up), a training aircraft like the Cessna will fly straight and level if your windscreen is 1/3rd ground and 2/3rd sky – this is called the ‘datum attitude’. And sure enough, I spent a bit of time getting used to flying visually. Not being the tallest of people I found that closer to 1/4 ground and 3/4 sky allowed me to fly straight and level, so there’s a short-arse top tip for free.
Next, as discussed earlier in the briefing room we began some control sequences.
In an aircraft you have 3 axes of control (plus the throttle, which I always think should be included but I’m not an expert!):
- Pitch – the nose going up or down – when you take off in your airliner going on holiday and the nose points into the sky and you go heavy in your seat, that’s the aircraft ‘pitching up’. Pitch is controlled by the elevators – movable control surfaces on the small wings either side of the tail fin known as the horizonal stabiliser.
- Roll – one wing going up and the other going down, this is how aircraft typically change direction. Roll is effected by control surfaces on the outer parts of the back (‘trailing edge’) of the wing.
- Yaw – making the nose go left or right. If you’ve ever landed in a big jet in strong winds you may have felt yaw as a big sideways movement that feels like the plane’s about to skid off the runway, in reality this is because if there is a crosswind – i.e. the wind is not blowing straight down the runway but instead is from the left or right of the runway, pilots will point the nose slightly into the wind to keep flying straight towards the runway. On landing, the the pilot using the rudder (attached to the trailing edge of the tail fin (‘vertical stabiliser’)) to quickly point the nose straight down the runway.
We started with pitch – setting the throttle to maintain 2350rpm, the Reims-Cessna 172K’s ideal cruising power, and I pulled back on the yoke, which tilted the elevators in such a way that pushed the nose upwards. I held the nose of the aircraft visually on the top of the horizon (or just above, applying the appropriate short-arse pilot offset). Exactly as briefed earlier, I saw the secondary effects of pitch – “airspeed decreasing,” I called out to my instructor. I then pushed the nose forward to resume flying on the datum attitude.
Next came roll, we made some left turns and right turns, easy peasy, right? Not quite. The secondary effect of roll is yaw (‘slip’), which requires use of the rudder to mitigate (called ‘coordination’ or ‘coordinated turns’). There is a handy instrument called the turn indicator which shows how much slip you have in your turn by displaying a black ball in a rectangle. When you roll left the ball will go left too, requiring you to ‘step on the ball’, or push the left rudder pedal down to counter-act the slip. This is more natural and easier than it sounds.
Finally we did yaw, with a spicy finale.
Secondary Effects of Yaw
We started in level flight and pushing the rudder pedals down hard, first left, then back to centre, then right. I was not expecting yaw to be quite so powerful but with each press of the rudder pedal we were flung hard left or right in our seats, it was like being in a fast car going around a very tight turn at speed.
But every time we pushed the rudder pedals we also began to roll, that’s the secondary effect of yaw. I found myself turning the yoke to maintain level flight, counteracting the induced roll.
“I have control,” said my instructor before explaining that he was going to do an uncoordinated yaw manoeuvre and we would enter a spiral dive.
Wait, what?
He pushed hard on the right rudder pedal and the nose of the plane started to turn right, we were thrown left in our seats – Newton’s 3rd law in action. But then the right wing started to descend as the roll began, the bank angle exceeded 45 degrees before the nose dropped and we had a windscreen full of North Sea, thankfully still 3,000ft below us.
“Rudder to neutral, roll level, pitch up,” the instructor said performing those actions, and within a few seconds we were back flying on the datum attitude and then climbed a little for safety. “Now your turn, you have control.”
Cautiously, in all honesty, I pushed down on the rudder pedal, felt the aircraft yaw, then roll. I fought every instinct to counter-act the roll with the yoke as the nose dropped. At this point, again with the North Sea filling the windscreen, caution, nerves, fear were nowhere – my brain repeated the procedure: rudder neutral, roll level, pitch up to datum. And we were back flying at the normal attitude.
Flying is all about routines and processes. This takes all the stresses and concerns out of flying – in reality, you’re too busy to feel much in the way of emotions.
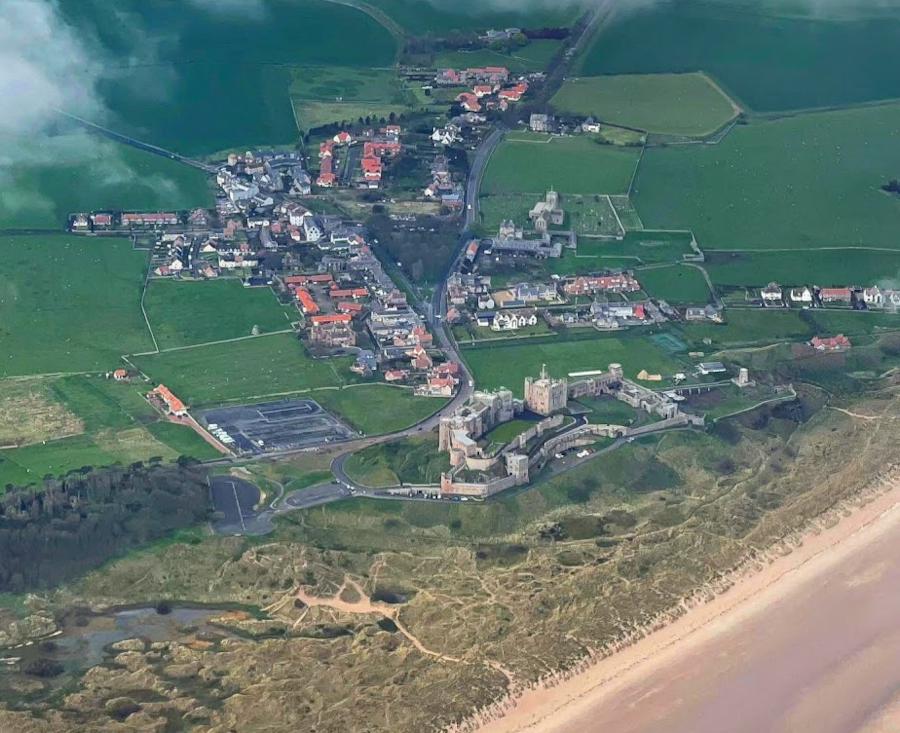
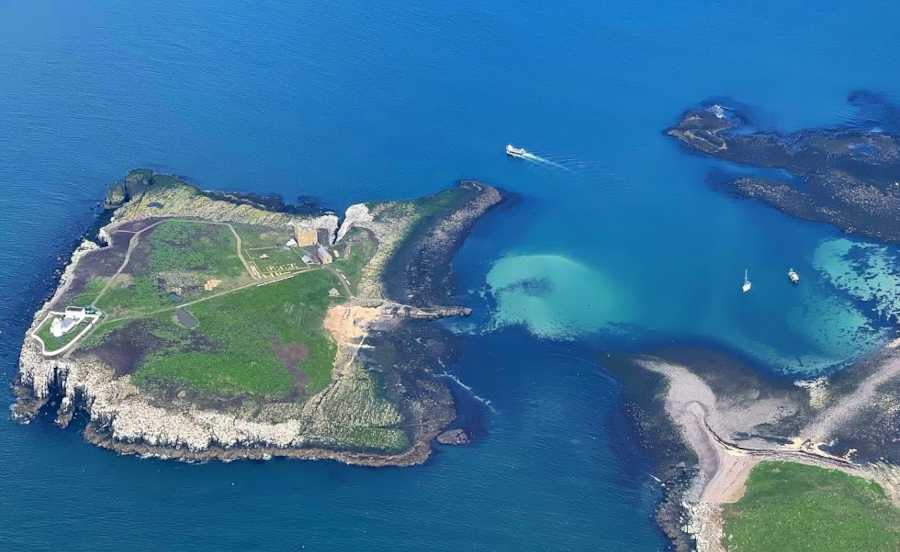
My instructor let me get a few quick snaps of Bamburgh Castle and the Farne Islands before asking me to head back towards the airfield.
Approach
I’ve landed Cessnas on flight simulators since before I was in my teens and, although I doubted I would be allowed to do so on my first lesson, I had little doubt I would be great at landing.
Turns out, simulators and real life are quite different.
With the runway in sight I tried to line the aircraft up with it and start descending towards it, but I found myself either drifting sideways or being too high / low. At around 300 feet, with the runway extended centre-line (an imaginary continuation of the white lines down the middle of the runway towards landing aircraft used by pilots to line up to land) off to our left and our altitude about 100ft too low, my ego crumbled.
“I have control,” said my instructor, before guiding the Cessna back onto the extended centreline and executing a perfect landing.
Show off.
After taxiing to our parking spot and doing another ROSAMS check (a courtesy for the next training flight), I pulled the red-knobbed mixture control fully out, depriving the engine of fuel and stopping it with a slight wobble.
The first lesson was over and 1 hour and 15 minutes of time was added to my logbook.