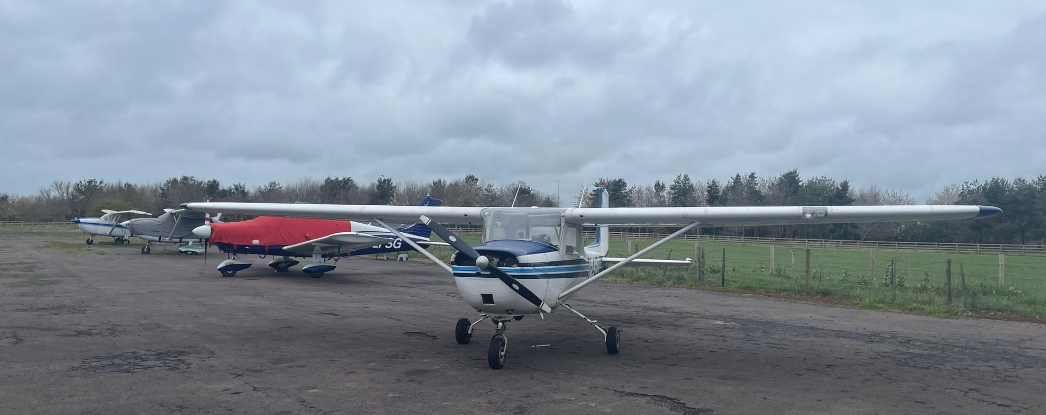
Clouds covered the sky and grey cotton wool balls hung lower than the overcast here and there. As I steered the car north I thought it might end up being a ground school day.
My instructor was stuck in the Caribbean. He flies heavy long-haul jets for a large airline and his A330-300 had a technical issue, so I booked this lesson with the flight school’s Chief Flight Instructor; a seasoned flyer with every type rating and additional endorsement you can imagine.
METAR
Plan A was to practice full-flap landings in the circuit. The circuit height is 1,000ft above airfield level (aal) and to legally fly under Visual Flight Rules (VFR) we just need to be “clear of cloud”.
In aviation, clouds are a near-constant companion in the skies and there is a range of terminology related to them which is important. Cloud cover is measured in “oktas”, or eighths (/8s).
CAVOK – Pronounced “Cav-Okay”, means Ceiling and Visibility OK (usually signifying clear skies with good scope for visual flying)
NSC – No significant cloud – means no cloud layers below 5,000ft, no towering cumulus (big fluffy white clouds caused by convection) or cumulonimbus clouds (great big dark storm clouds, usually in the shape of an anvil which can reach upwards of 50,000ft!).
Clear (CLR) / Sky Clear (SKC) – No clouds / clear sky or up to 1/8th of the sky is covered with cloud. CLR is used if no layers are reported below 12,000ft by automated stations. SKC is used by manual stations in the same situation.
Few (FEW) – A layer of sparse cloud where between 1/8th and 2/8ths of the layer contains cloud. If any cloud is present, however light, stations may still report this as “FEW”.
Scattered (SCT) – A layer where 3/8ths to 4/8ths (1/4) is covered with cloud
Broken (BKN) – A layer where between 5/8ths and 7/8ths is covered with cloud
Overcast (OVC) – 8/8ths of the layer contains cloud (complete cover)
VV – Vertical Visibility, used in fog situations where the clouds are effectively on the ground or in heavy precipitation.
Cloud base – The lowest layer of clouds
Ceiling – The lowest layer of more than 4 oktas (i.e. BKN or OVC).
Looking up from the ground, we couldn’t tell how high the base of the clouds was. I pulled up the METAR (meteorological aerodrome report) for nearby RAF Boulmer which is a Royal Air Force (RAF) base with a weather station just a few miles north east of the airfield and it showed that the cloud base (and simultaneously, the ceiling) was 2,400ft above ground level (BKN024). It was definitely 8 oktas cover at the airfield though.
Perfect! But we needed a Plan B just in case the weather deteriorated.
“Go get your 250,000:1 map,” said the chief FI.
I grabbed my map and unfolded it. It still had a route I’d planned for flight simulator drawn on it.
“You never plan like that,” he said bluntly.
In other areas of my life my ego would have been bruised but I’d learned the hard way that egos have no place in aviation – we’re all learning. Especially the student pilots! So I was quite excited to learn about navigation which I’ve yet to really scratch the surface of.
The route I’d flown assumed you’d fly from one large landmark to the next, in this case, up the coast from island to island, however, “you try to fly in a straight line where possible,” he corrected me.
We agreed if the clouds came in too much we’d head away from the airfield and do some navigation practice.
Take Off
I performed all the pre-flight checks and the Chief FI and I jumped on board. I thought I’d hit the record button on the GoPro but sadly failed to press it properly, so no video unlike last time.
“Which runway?” posed the Instructor.
I checked the wind sock and it was pointing due south, meaning the wind was coming from the north. “Runway zero-one,” I replied, indicating the runway pointing at 10 degrees on the compass, practically due north.
He nodded and I made the radio call, “Golf-Zulu-Uniform, backtracking runway zero one to Bravo.”
At holding point bravo I ran through the power checks and vital pre-take off checks. Knowing that the engine was in good shape and the trim, flaps and transponder were all where they should be I taxiied to view the approach to runway 01. Seeing no traffic, I radio’d “Golf-Zulu-Uniform, ready for departure, lining up runway 01.”
Once in the air I raised the flaps at 300ft and at 450ft I lifted my left wing slightly to check for any traffic hiding above us. Seeing nothing I turned at 15 degrees of bank (a “rate one” turn) onto a westerly heading, the large, dark silhouettes of Thomson Rock and Lordenshaw Hill, part of the Cheviot Hills, against the lighter grey sky being my visual reference point for “roughly west of the airfield”.
On the downwind leg I made the mandatory radio call, “Golf-Zulu-Uniform, downwind, runway 01”, and ran through the BUMFILCH checks. When I was finished, the instructor said, “approach as normal, 20 degrees of flaps, but stay high.”
First Full Flap Landing (Alliteration is Fun!)
I configured for landing (carb heat, reduced power, lowered 20 degrees of flaps), turned onto base leg then onto final, keeping high.
“When you go over the A1, drop full flaps.”
The A1, the main road between London and Edinburgh, curves around the bottom of runway 01, about 300 yards from the threshold, before running almost parallel with it.
Slightly higher than normal, I arrived overhead the A1 and pulled the large flap lever in the middle of the cockpit fully up and back. Our speed suddenly started to drop and the deceleration was obvious as we both started to lean forward in our seats.
This was not unexpected though, and I dropped the nose to maintain a 60 knots approach speed. Even with the nose pointing a lot more down than I’m used to, I still had to increase power a little to maintain 60 knots – very weird. The little Cessnas with the huge flaps dropped fully into the oncoming airstream are very draggy!
The Cessna 150 has 5 flap settings: up, 10, 20, 30, 40 – the numbers signifying the number of degrees the flaps have moved. Flaps 10 are often used for take off (although flapless take offs are common too, I’ve never done one), 20 for a normal landing, and 30 to 40 for a steep approach. Flap 10 and 20 are referred to as “lift flaps”, because they increase lift at slower speeds without huge increases in drag, and flap 30 to 40 are called drag flaps, which help maintain slow speeds while diving down.
Following the instructor’s guidance back in the briefing I started to flare a little earlier than usual and kept the power on a little longer, letting the nose rise but only enough so that we ‘hovered’ just above the runway. Then I pulled the power out, counter-acted the right-yawing tendency when reducing power with soft left rudder pressure and began progressively pulling the control column back and back…
“Full power!” says the instructor – I had been briefed that we would do a touch and go with full flaps, not an ideal situation to be in as the drag effectively destroys your ability to climb, but a realistic situation to be in.
Short Field Operations
As full-flap landings are basically a nose-dive towards the runway, there are two main scenarios (that I can think of) why you would use this technique:
- To get over an obstacle at the end of a runway and still give yourself enough runway to land and roll out
- Landing on short runways (“short field” operations)
If you mess up the landing on a short field landing, for example if you balloon or float due to a gust of wind, then you will need to go around and you will be configured with drag flaps hanging in the wind.
You can not climb meaningfully with 40 degrees of flaps, instead you point the nose straight ahead, just enough to fly parallel above the runway, using a phenomenon called “ground effect” and build a little speed, you then start to climb a little, as soon as you have a stable gentle climb away from the ground and outside of ground effect you raise one notch of flaps (e.g. 40 to 30). Then once stable and still climbing another notch, 30-20, and so on.
Before I knew it we were already back on final – 20 degrees of flaps and looking higher than Snoop Dogg after a Superbowl after party.
“This time we’ll stop and go,” said the instructor.
I dropped the flaps to 40 degrees as we crossed over the A1 and pointed the nose down towards the numbers at the end of the runway (my “aiming point”).
Once over the trees and with the runway definitely “made”, i.e. we had enough inertia to carry us to the runway even without power) I began to flare and pulled the power back. We hovered over the runway a moment before….
Bump!
Not back enough! Not my softest landing, but not bad for the first landing attempt in a completely new and challenging configuration.
The instructor jumped out and I did a few more laps around the circuit to build my solo hours and proficiency. I need at least 3 hours before I start solo navigation.
I was having so much fun in the circuit I could have kept going forever but I had a lesson booked the following day and I was keenly aware that every second the aircraft was switched on was costing me a princely sum of money.
The Hobbs
When I was done I parked up, ran through the shut down checklists and switched everything off. Finally, I took a photo of the Hobbs Meter, every student pilot’s worst enemy:
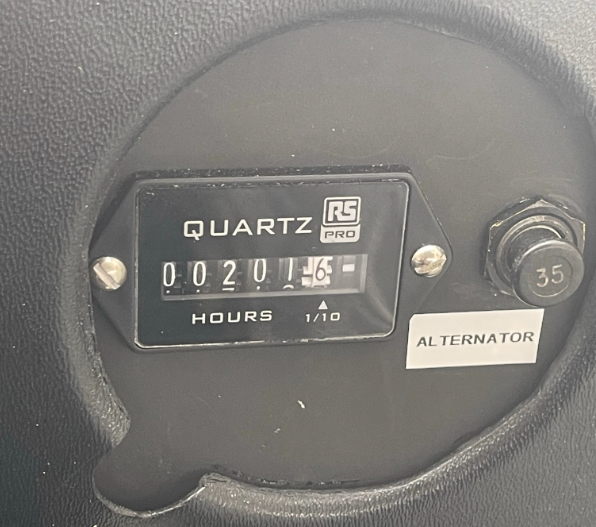
The Hobbs is a sealed unit that records how long the aircraft has been used. This is what you get charged on. Some Hobbs systems run while the aircraft electrical Master Switch is on, but as the aircraft will run just fine in the air with the master switch off, students and pilots have tried to save themselves some coin by doing exactly that.
These days, Hobbs meters run while there is oil pressure, which you need when you fly, so you don’t get charged while checking the lights work during the pre-flight check, but you can’t switch it off in-flight anymore.
I started this lesson with exactly 200 hours on the Hobbs, and landed with 1.6 decimal hours (1hr 36mins) to add to the logbook.
What Do (Student) Pilots Do After They’ve Landed?
Part of the aviation culture is food and drinking (soft drinks that is!).
Pilots will hire a plane and travel cross-country for a “$100 hamburger” (due to inflation these are now $500 hamburgers).
After an hour and a half of flying I opted for a gluten free (I have Coeliac’s disease so can’t tolerate gluten) bacon roll, and the chef gave me an extra one as the gluten free buns were a bit smaller than the glutenny ones.
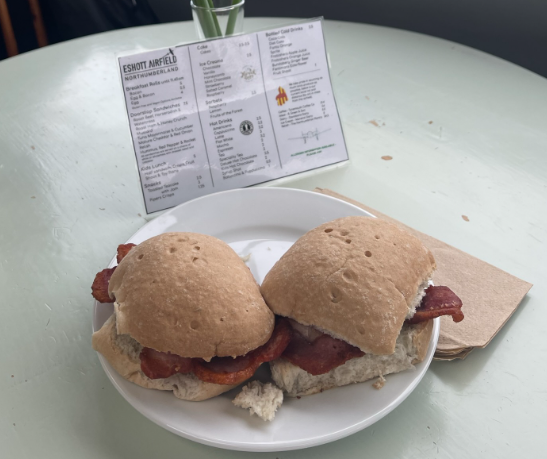
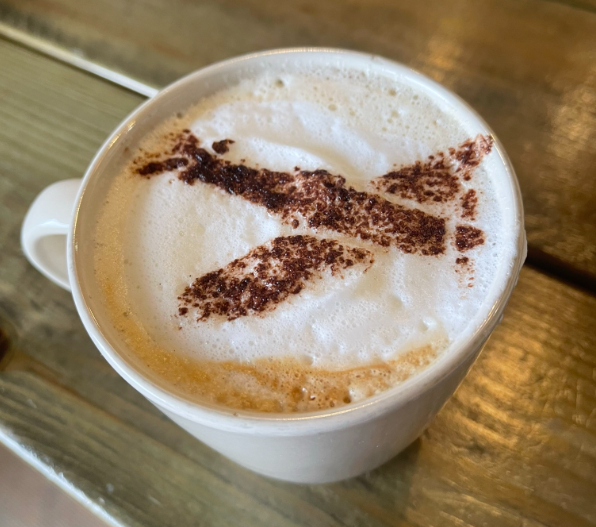
I also got a Cappuccino, which has been my routine since lesson 1, and every time I drink cappuccino now it reminds me of flying.
This time they showed off their new Spitfire chocolate stencil, which definitely made it taste even better.
What’s Next?
Next lesson will either be flapless landings or some navigation. I also need to start taking my theory exams.
To get your Private Pilot’s License (PPL) in the UK you have to pass 9 theory exams:
- Air Law
- Aircraft (General) Knowledge
- Meteorology
- Human Performance
- Operational Procedures
- Flight Performance and Planning
- Principles of Flight
- Communications (plus a Radio Telephony Operators License test)
- Navigation and Radio Aids
I have been studying a lot for my Air Law exam so I need to get that booked in ASAP too.
I’ve got 19 hours and 20 minutes in my logbook now and I need 45 hours before I can take the skills test which is the final step before getting licensed. The next 25 hours will go over very quickly though as these will be longer lessons involving cross-country flights of over 150 nautical miles in some cases (270km).
It’s about to get really challenging again, and I can’t wait.