 Today’s challenge: Serve a public API over HTTPS from a Raspberry Pi. I’ll follow up with an article about containerising the app and running it from docker on the Pi.
This article is a fast-paced guide to getting started without stopping to dwell on the details.
Some details will be mopped up in the last section for those wanting to know more.
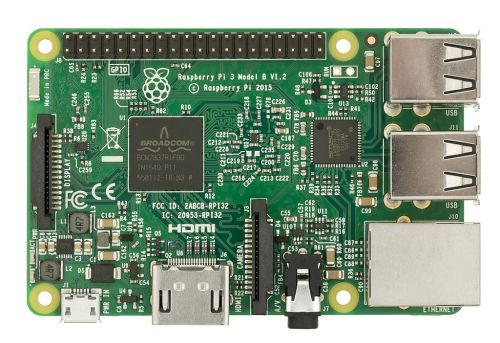
Prepare the Pi
On your development machine (you won’t need to interact with the Pi directly, so no 2nd keyboard or monitor required):
- Grab an 8Gb or larger microSD card and use Etcher to flash the Raspbian Lite image to the card.
- Create an empty file in the root of the microSD card called “ssh”, with no extension, this will enable ssh on Raspbian.
- Put the microSD card in the Pi, plug in a network cable and then plug in the power
- After a minute attempt to ping the pi:
ping raspberrypi
- If you get a response, ssh into the pi from a Bash shell (on Windows, you can use the bash shell that comes with Git):
ssh pi@raspberrypi
- The “pi@” means you’re logging in as the “pi” user account. The default password is “raspberry”.
 Installing the .NET Core prerequisites
This bit looks hard but is quite easy (thanks Dave).
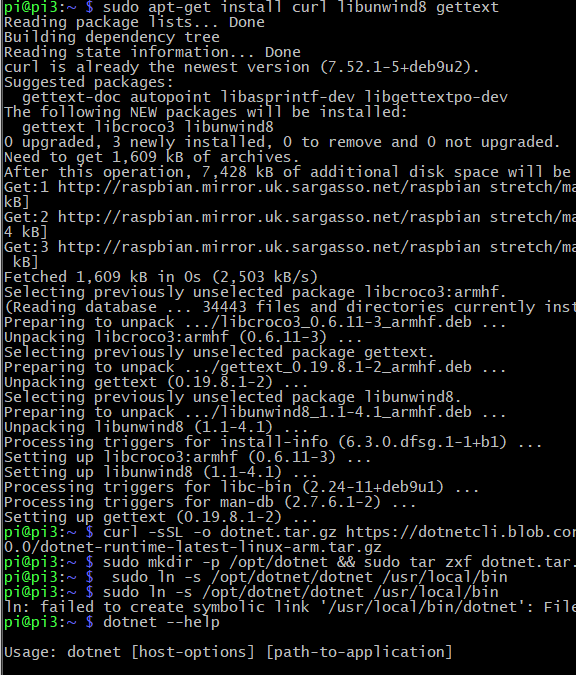
At the ssh prompt, install the .NET dependencies by running each of the following commands (you can copy and paste these commands straight into bash):
sudo apt-get install curl libunwind8 gettext
curl -sSL -o dotnet.tar.gz https://dotnetcli.blob.core.windows.net/dotnet/Runtime/release/2.0.0/dotnet-runtime-latest-linux-arm.tar.gz
sudo mkdir -p /opt/dotnet && sudo tar zxf dotnet.tar.gz -C /opt/dotnet
sudo ln -s /opt/dotnet/dotnet /usr/local/bin
you can check if the .NET Core runtime has been installed by running:
dotnet --help
You should now see some the runtime command line options.
Configuring the App
If you don’t already have an ASP.NET Core app:
- Download the SDK for your platform (Mac, Linux, Windows) from https://dot.net and install it
- Make a new directory and navigate to that directory at the command line.
- Run:
dotnet new react
By default, a new ASP.NET Core application will be set to only listen to requests only from the TCP/IP loopback address (127.0.0.1 or localhost), so:
Open up Program.cs in your ASP.NET Core app and change the BuildWebHost method to add the following:
public static IWebHost BuildWebHost(string[] args) =>
    WebHost.CreateDefaultBuilder(args)
        .UseKestrel(options => {
            options.Listen(System.Net.IPAddress.Any,
                5000,
                listenOptions => {
                    listenOptions.UseHttps("raspberrypi.pfx", "<your-password>");
                }
            );
        })
        .UseStartup<Startup>()
        .Build();
This means that when the app runs on the Pi it will accept requests to port 5000 from external clients.
Please note, Kestrel is not a supported edge server, it is designed to run behind a reverse proxy such as nginx, Apache HTTP Server or Microsoft IIS when exposed to the outside world. Read and understand this before you open up your Pi to the big bad interwebs.
Deploying the App to the Pi
I’m not offering DevOps perfection here, I’m afraid we’re just going to FTP the app across to the pi. But first we need to compile the app so it works with the Raspberry Pi’s low-power ARM processor.
On your development machine, drop to the command line, navigate to your project directory and publish your app so it works on Raspbian by executing the following command:
dotnet publish -r linux-arm
 This creates a bin/Debug/netcoreapp2.0/linux-arm/publish directory that contains the binaries for your ASP.NET Core app.
Grab your favourite FTP client. If you don’t have one, FileZilla will do the trick.
Connect your FTP client to your Pi by entering the following details:
Host: raspberrypi
Username: pi
Password: raspberry
Port: 22
The FTP client should show you the directory structure on the Pi. Copy the contents of your linux-arm/publish directory to any path on the pi (I chose /home/pi/piservice/) using the FTP client.
HTTPS
We’re going to use a self-signed certificate to show HTTPS is possible. In a real-world scenario you’d sign a relatively short-lived RSA keypair with a certificate signed by a trusted root cert (and also, you’d probably not use a Raspberry Pi and publicly-exposed Kestrel Web Server to run your services, but hey ho).
SSH into your Pi again and run the following command to create a public and private key pair that will be valid for a year.
openssl req -x509 -newkey rsa:4096 -keyout key.pem -out cert.pem -days 365
Next, generate a .PFX file from the two generated PEM files (thanks to Pete S Kelly):
openssl pkcs12 -export -out raspberrypi.pfx -inkey key.pem -in cert.pem
This creates the “raspberrypi.pfx” file that your ASP.NET Core app now refers to in Program.cs.
Running the app
At the SSH prompt, tell the .NET Core runtime on teh pito start your app:
dotnet <yourappname>.dll
<yourappname> will be the name of the project you created if you used Visual Studio, or the name of directory you created that you ran dotnet new in. Typically this will be something like HelloWorld.dll or Acme.Web.dll, etc.
 If all has been successful you’ll see the following echoed in your SSH session on the Pi:
pi@raspberrypi:~/piservice $ dotnet src.dll
Hosting environment: Production
Content root path: /home/pi/piservice
Now listening on: https://0.0.0.0:5000
Application started. Press Ctrl+C to shut down.
(My emphasis). From your development machine you should now be able to begin making requests to your app hosted on the Pi, https://raspberrypi:5000/
You will get errors about the certificate being untrusted, this is expected as your development machine has no reason to trust the little $30 computer, but you can skip past them – or read the final section of Peter Kelly’s article to learn how to trust the Pi’s self-signed certificate.
Making it Public
This is where things turn a bit vague as it’s up to you how you set up your network.
At the most basic level you need to tell your router to send traffic to port 5000 on your Pi. This usually involves adding a Port-Forwarding Rule. You’ll need to know your Pi’s IP address to set up the rule, so it makes sense to either give the Pi a static DHCP lease. Please refer to your router’s user guide for specific information.
To call your Pi from the outside world you’ll need your router’s public IP address – of course it’s best if this is static, ask your ISP if this is an option – and then you can set up a domain name to point to this IP address.
You can get a proper SSL certificate for your domain name from LetsEncrypt, or any other certificate provider.
Note: You’ll get SSL certificate errors when using a self-signed certificate, and browsers may stop allowing access to sites where the certificate doesn’t match the public domain name.
Follow Up
I’ll follow up soon with an article on containerising the ASP.NET Core app and running it on Docker on the Pi.