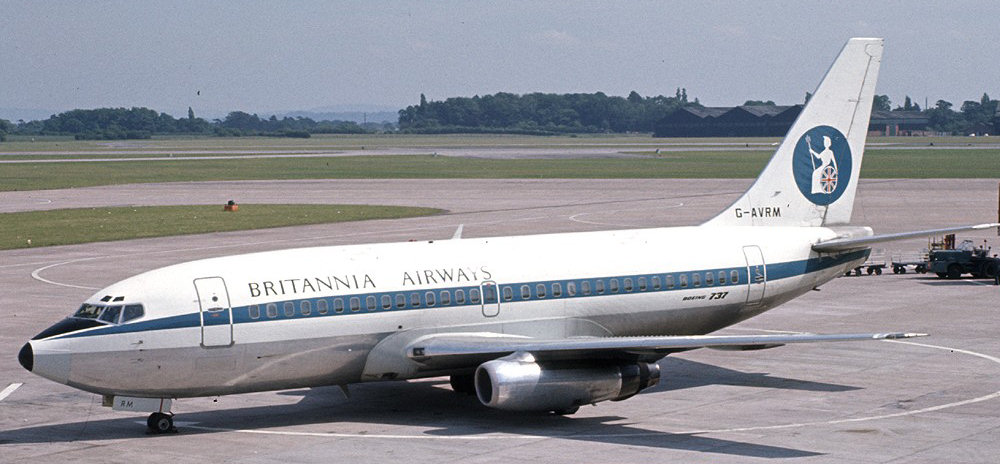
Last weekend I traveled to Harrogate in Yorkshire to try my hand at flying the Boeing 737-200 airliner.
Hidden away in a hangar on the outskirts of the beautiful (and quite historical) town is Real Simulation, a company selling flight simulator experiences in their full-motion 737 and F4 Phantom sims.
Upon arrival (arf arf…), I met Captain Peter, an experienced pilot whose long career started in the Royal Air Force and ended with the airlines ferrying self-loading freight. He told me fascinating stories about the times he learned about the treatment of jet fuel (and how it turns into a gelatinous, frog-spawn-like substance when it isn’t done properly) and the time he got to fly a British Aerospace 146, which was scraping the bottom of the MEL – Minimum Equipment List – across the Irish Sea. The MEL defines the absolute least amount of functioning equipment a plane must carry to be dispatched legally. Peter said, “we had two crew, four engines, and that was about it.”
Dispatching a Boeing 737-200
Peter led myself and two other eager wannabe airline pilots to the simulator. First impressions were that it was quite roomy – behind the instrument panel and flight yokes were the Captain and First Officer’s seats. Behind those was a roomy space in front of two observer chairs. Behind those, a large open space with a whirring computer in the corner. It was about as big as one of my childhood bedrooms. But at one end there was a plane’s cockpit. And this one moved about on hydraulics.
Now, anybody who knows me knows I like a good blast on Microsoft Flight Simulator, so I was quite confident that I could tell the VSIs from the HSIs and the GS indicators from the EPR gauges, but what I was really worried about was my actual flying ability. Microsoft Flight Simulator will teach you how to read instruments and how to configure an aircraft for departure, but it really doesn’t prepare you for crabbing a 40-ton bird into an airfield with a gusting crosswind and a thrust lever that is almost out of reach (more on that later…).
At Peter’s command, I climbed into the Captain’s chair, which was easier said than done. There is a little gap between the centre pedestal and the pilots’ chairs on either side. Actually getting into the seat requires quite a bit of contortion and flexibility. However, once in the seat, it was surprisingly comfortable.
Being only 5′ 9″ (ish) I was concerned that I’d be struggling to reach the rudder pedals or unable to push the yoke away from me enough to make the thing descend, but the controls were all within fairly easy reach. With one exception: the thrust levers… When you drive a car, you have everything you need right within arms’ reach, but in an aircraft you have two crew and some of the controls are shared and in the middle of the cockpit. I was expecting to find the thrust levers (or “throttles” if you prefer – Peter did because the RAF did) fitting snuggly in my right hand as my left hand gripped the yoke and deftly guided the big metal bird onto the asphalt but as soon as Peter and I started to cooperatively advance the throttles I had to lean forward and towards the middle of the cockpit to push them forward as far as they needed to go. And that wasn’t even all the way. We used “flex” thrust, in other words we didn’t use all the available power of the engines to get airborne, this reduces wear and tear on the engines and improves lifespan while lowering maintenance costs.
Unlike in a car where the gearstick is right next to your hand, in between the Captain and the thrust levers is the gap to squeeze into the seat, a big trim wheel, a stabiliser trim indicator and the speedbrake lever. It’s quite a stretch…
But I’m getting ahead of myself.
Peter and I went through the checklists. We ensured the pressure setting in the Kollsman Window were reading the same in both the left and right altimeters, and also in the centre backup instruments. We were at Aberdeen so each altimeter read 220ft above mean sea level (MSL). Next, we set the speed bugs – little movable plastic markers around the outside of the airspeed indicator – so we knew when we reached the critical speeds, called V-speeds:
- V1: The speed for that specific type of aircraft, on that specific runway, where you are committed to taking off – i.e. there isn’t enough runway left for you to stop.
- VR: The speed at which to rotate (pull back on the yoke and lift off the runway).
- V2: The speed at which an aircraft can safely climb out of the runway if an engine fails.
Our 737 sat on runway 16 at ABZ/EGPD, to use Aberdeen’s two international designations. Runways are numbered by their compass heading, divided by 10 and rounded to the nearest whole integer. So runway 16 heads in roughly 160º – our nose was actually pointing at 162º – close enough. Our gross weight was a nice, round 40 tons, so a quick look at the performance book indicated our V1, VR and V2 speeds: 115 knots, 121 knots and 128 knots respectively.
The performance booklet also gave us another number: “2.11 EPR”. EPR stands for Engine Pressure Ratio, in effect a measurement of how much thrust the engine is producing, indicated as a ratio between the pressure at the front of the engine and the pressure at the back. We’d need 2.11 EPR to get airborne in time.
“Set thrust,” said Captain Peter.
With one hand on a little steering wheel to the left of the flight yoke (called the “nose gear steering tiller”) and the other on top of the two thrust levers a mile away on the centre pedestal, I pushed my right hand forward until the EPR rose and settled at 2.11. The whistle of two Pratt and Whitney JT8D, low-bypass turbofan engines intensified and got louder. Meanwhile the entire aircraft lurched and started to rattle down the runway.
At 80 knots, Peter said, “80 knots.”
80 knots is another important speed. At that speed you can start controlling the aircraft using its aerodynamic control surfaces, ailerons (roll), elevators (pitch) and rudder (yaw). I moved my left hand from the nose-gear steering tiller and put it on the flight yoke. Trying to use the more-sensitive nose gear steering above 80 knots is a recipe for losing control.
“80 knots,” I confirmed, using my own airspeed indicator. At this point, if our gauges were not in sync with each other the takeoff would be aborted. Airspeed is life. It is what keeps you in the air. Aircraft have crashed because of a lack of (or unreliable indication of) airspeed. But we looked good to go.
I tested the rudder pedals and gradually I felt their effect on the direction of the aircraft become enhanced as more and more air rushed over the large vertical stabiliser, to which the rudder is attached. You may have heard it called a “fin” or “the tail” before.
Before I knew it, Peter said “V1”.
At this point we are committed to the takeoff – we couldn’t stop in time even if we wanted. As is customary, I moved my right hand away from the thrust levers and placed it on the yoke alongside my other hand. If an engine bursts into flames or you lose a tyre, you don’t want a panicky pilot trying to cut the thrust! It’s actually safer to get airborne and try and make it back to the airfield.
“Rotate,” said Peter as we reached 121 knots.
Actually Flying the Boeing 737
I gently pulled back on the yoke and felt the craft begin to swing towards the clear blue skies above Aberdeen (the only unrealistic bit of the entire experience so far). I lifted the nose to 15º and held it there, as Peter had briefed us to do before the engines were even turning.
“Level out at 3,000ft. However many thousands of feet per minute vertical speed you’re doing, that’s how many hundreds of feet below your target altitude that you need to start leveling off at.”
At 2,500ft I checked the VSI – Vertical Speed Indicator – and saw that we were climbing at 4,000ft per minute, so I’d have to start leveling off at 2,600ft. I pushed the yoke forward and watched the needle on the VSI begin to lower. Peter was spot on – the altimeter stopped at 3,000ft just as the VSI settled at 0. I was slightly proud of that.
I had to push forward quite a lot to keep the aircraft going level at 3,000ft so I dialled in some stabiliser trim using my left thumb. “Trim” is the ability to use little flaps on the aerodynamic control surfaces to stop you having to hold the yoke or rudders in a particular way just to maintain straight and level flight. A properly trimmed aircraft will fly straight and level with the pilot’s hands and feet off the controls. Before autopilots, this was how you would “cruise”.
With every push of the trim switch at my thumb, the massive black wheels on either side of the central pedestal span and clattered. Everyone knew I was trimming. There have been cases where aircraft have crashed because of “runaway trim”, the trim flaps (actually called “tabs”) move so far that the aircraft becomes difficult to control. Peter said, “The Jet2.com Operations Manual says to only operate the trim in one-second bursts.”
I eventually got the “stab trim” (short for horizontal stabiliser trim – the horizontal stabiliser being the little horizontal wings at the back of the plane, at the back of which are attached the elevators, which control pitch) dialled in nicely and took my hands off the yoke to show Peter that we were good.
I then carried out a few 90º turns, first left, and then right.
“You’ve maintained your altitude!” Peter exclaimed. Sure enough, the altimeter read exactly 3,000ft. “Most people lose or gain a thousand feet doing those turns.” I resisted the urge to describe the sheer number of hours I had spent practicing doing just that on my PC at home….
“Let’s do some landings shall we?”
(To be continued…)
